I'll have to make another one for myself (I love owls!) at some point, and remember to take it down a size. You need to know how to do post stitches to make this.
Pattern: here.
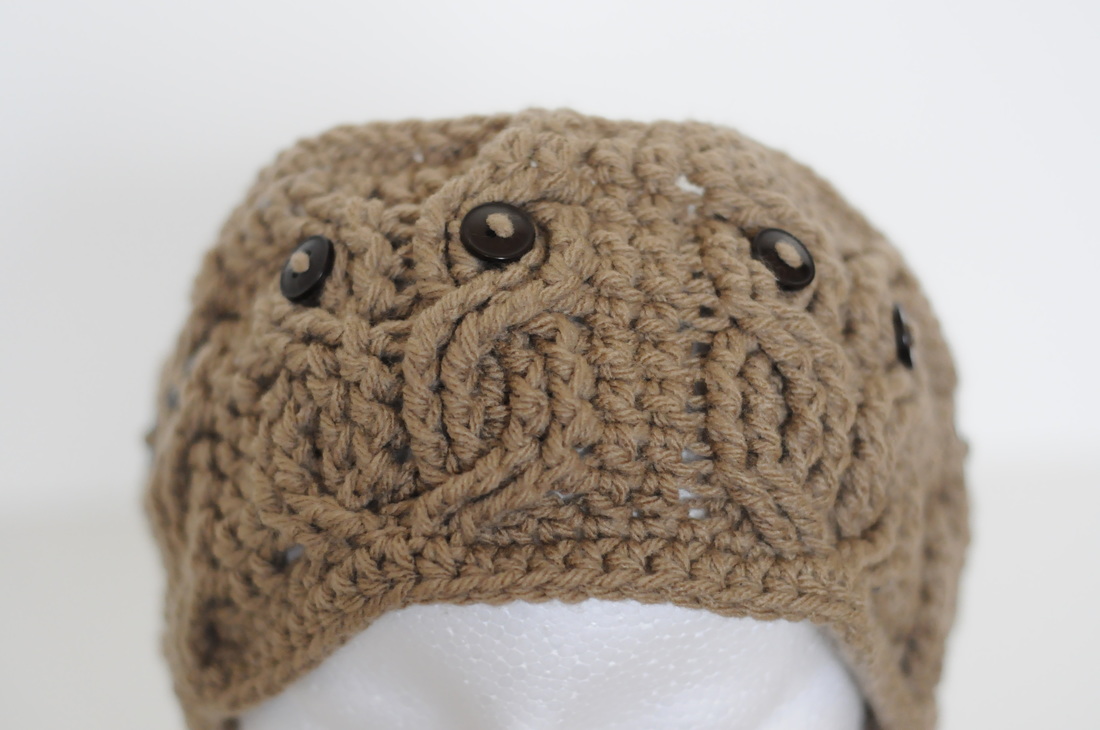
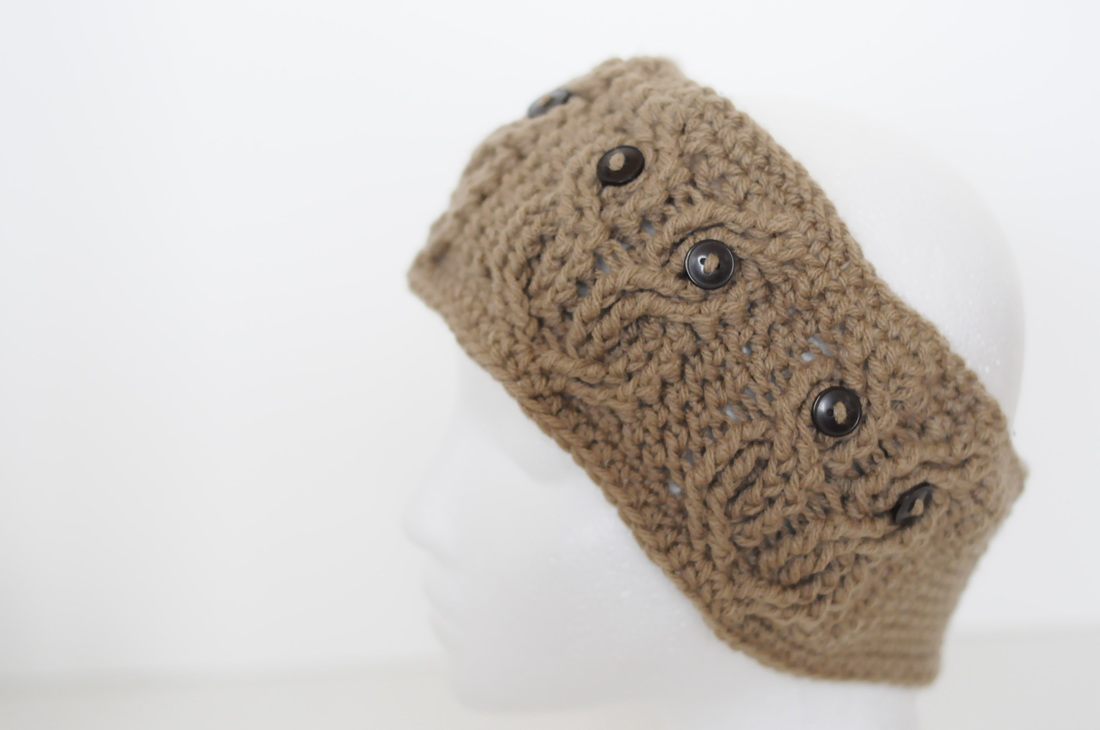
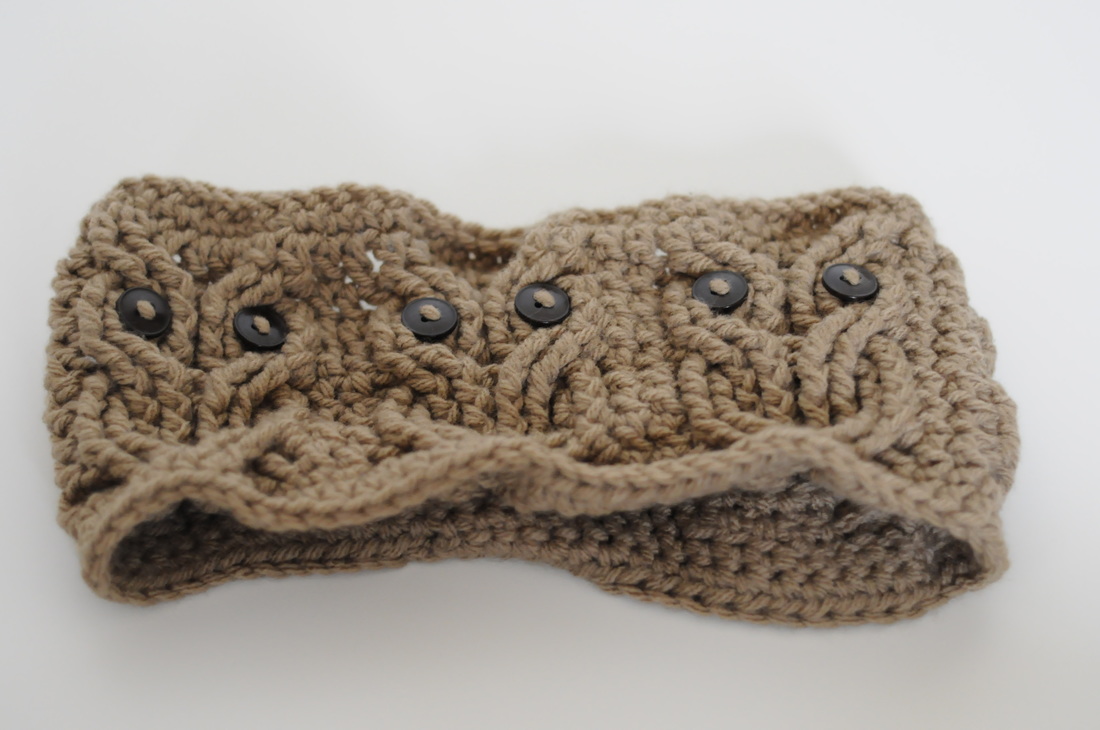
This item will very likely be available at the craft show. I followed the pattern without adjusting any sizing. After it stretched out (like all crocheted things do after a week's wear or going through a washer/dryer), it was too big for my small head. The mannequin's head is even smaller than mine. If this was on a bigger head, it would look perfect. It doesn't lay flat after being washed, but it would lay flat on a bigger head.
I'll have to make another one for myself (I love owls!) at some point, and remember to take it down a size. You need to know how to do post stitches to make this. Pattern: here.
0 Comments
The pattern for the cardigan: here.
The pattern for the scalloped edge: here. I had to make a few adjustments, as I was off by a few stitches after the treble crochet rows. For the arm hole widths, I chained 18 and stitched into the 19th stitch, and I only had 6 sets and two half-sets of bobbles for the backside. I made a scalloped edge along the bottom. Front edges: 1 row of half double crochet (wrong side facing out), 1 row of single crochet (back loop only, right side facing out). Button-holes: chain 2, single crochet 2 Collar: 1 row of single crochet, another row of single crochet (decrease after every 5 stitches, front loop only). Collar corner (row 1): in corner hole {2 half double crochet on side that is closest to front, chain 3, 1 single crochet on side that is closest to neckline} Collar corner (row 2): {single crochet, chain 1, single crochet} The silver buttons were originally from Kmart (3/$0.90), but I got them at a thrift store for 3/$0.25. This item may be available at the craft show. I'm still quite attached to it. If I knew it would fit my newest baby niece, I would give to her, but I think it would be too small for her already. I'm quite tempted to keep it for my own (yet-to-be-conceived) baby... I've gotten a lot of positive feedback from people regarding the jade ear warmer I made the other day - the one with the blossoms and branch. I decided I liked the look of it, too, so I decided to make one for myself for the upcoming winter (or fall, depending how cold it gets).
Ear warmer pattern: here. Blossoms pattern: here. This item will not be available at the craft show, because it is for me. I had to search for two leftover balls of olive yarn, and they're all I had left. I'm super excited to have an ear warmer that matches the olive infinity scarf I made last winter. :) I made this over the last two days. Been feeling like I'm in kind of a crocheting rut with not a heck of a lot of motivation, but I do like this beautiful ear warmer and the design I made on top of it. Love, even. This is the first ear warmer I made from this pattern, and I made a second one entirely from memory right after. I'll post pictures of that one once I make a design or add-on for it.
Pattern for ear warmer: here. Pattern for cherry blossoms: here. For the branch, I couldn't find a patterns, I made it just from looking at the pattern's photo. I started off with a long chain, then double crocheted, half-double crocheted, single crocheted, and slip-stitched my way down the chain to make the branch start off thick and then narrow as it got longer. I added a new chain to the side of the branch where I wanted it to separate a third time. (For the first branch separation, I chained again after slip-stitching the main trunk of the branch, and the two chained ends could be arranged separately.) I sewed it all on by hand with the twine-like yarn for the blossoms, and with sewing machine thread for the branch and pearls in the centre of the blossoms. I fully recommend this ear warmer headband pattern. (I made a chain loop and sewed on buttons for attaching, with two buttons so it's adjustable.) This item will be available at the craft show, as well. Note: it's a little more green-y in person. My roommate modeled some of the recent items I've made. I think she looks especially great in the green hat in the first slideshow. (Sorry, roommate, that item is for the craft show!)
This ear warmer headband was made the other day, but I made the full rose this afternoon. Next time I'll try to make the rose wider at the bottom before sewing the petals together, as this rose is quite tall-looking. I used a 4.5mm hook.
I recommend this pattern. It's easy, repetitive, and it makes a thick, full flower. I tied the rose on to the ear warmer headband, but it is definitely removable. My friend sent me the link to the pattern (I loved her roses she was making for her own headbands!). You can find her Facebook page with her crocheted items here: Blessings by Charity. The ear warmer headband pattern: here. The full rose pattern: here. Both of these items will be available at the craft show (together or separately). The other day, I made this gold slouchy beanie. I intentionally made it to match the shell stitch scarf I made the week before (stitch pattern: here). I used the same basic pattern as the moss slouchy beanie, but I made the ribbing with a 4.00mm hook (11 ch stitches to start), and I winged the rest of the hat until it measured the 11" in length from ribbing to top. I used a 5.00mm hook for the shell stitches. I think I started and finished this hat in one day.
I was intending to add buttons to the moss beanie, as well, to add a finished-looking flair to it. Do you think I should add buttons to the moss beanie? This hat will be available at the craft show in November, as well. I'd love to sell the hat and scarf as a set, but I'd probably be willing to sell them separately if someone really likes one but isn't crazy about the other. Of course, the price would be a bit reduced if buying them as a set. (The items will not be at the craft show if someone speaks for them before that date.) I kind of love these hats. It's hard to dedicate new items to the craft show. I want to keep them all! Ps - I'm not sure why the second picture in the slideshow is so blurry. Oops! I found this pixie elf pattern the other evening, and today I decided to give it a whirl. It looked easy enough. I wanted a hat a bit bigger than the pattern was written for, so I chained 49 instead of 43 stitches at the beginning. Next time, I would add or subtract 2 chain stitches to make sure the back-post double crochet stitches start and finish the chain row consistently. I made this hat in about 2 hours, all while talking on Skype with a friend in another province (hi, friend!). I made the strap without fastening off first (chained 20 stitches for the strap, and half-double-crocheted down each side of it). It looks cute. It was super easy (think beginner easy) and quick. It was nice to not have to read a pattern constantly for increases and decreases each row.
(Just pretend that there's a baby's head in the pixie hat in the photos, 'kay?) I definitely recommend this pattern (the link is above), whether you're a beginner crocheter or more advanced. I left the fur trim out for mine, but the pattern tells you how to attach that type of yarn. My furry-looking yarn was too thick to be nicely attached, so that's why mine doesn't have the cute trim. I do think it looks nicer with the trim, though. his hat will be available at the upcoming local craft show. Isn't it adorable?! It is also adjustable (the strap buttons on at any point along the ribbing). Ps - Thanks to everyone who's been checking out the blog! It's so nice to have some instant "likes" on posts. It keeps me going! To whoever it is that's been liking them all (I know there is one of you) - thanks! Also, please feel free to add comments on one or more posts. Everybody loves comments! I wrote a pattern several days ago for teeny mary jane-style baby shoes. I made a toddler size, as well. I'm on my third time going through the pattern to make sure there are no errors in it before making it available to other crocheters. Here are some photos of them (taken with my camera this time). Everyone who's seen them so far in person has been ooo-ing and ahh-ing over them. I'm planning to make several pairs to sell at an upcoming local craft show (mid-November). I kind of love these shoes. Like, a lot. To the point of making a pair for my unborn child (I'm not pregnant, married, or even engaged). That's how much I like these little things.
I'd been looking a while back for a good tea cup cozy pattern. I'd looked on Etsy, but didn't want to pay for something that looked so simple. I made two of my own cozies, but they were difficult and I wasn't super thrilled with them (but they're still functional and cute). I later came across a pattern for a tea cup cozy that was super simple, used a cute stitch, and is extremely functional. I made mine 8 rows tall instead of the suggested 5, and I added buttons for a cute sweater-like look. I use this cozy regularly (seriously, it's on a shelf next to the kitchen window) and it keeps my hands from holding a piping hot mug ('cause who wants to drink lukewarm coffee, anyway?). The brick red colour is wonderful, but I only had a small ball of it (it was given to me). The bottom serves as a built-in coaster, which is awesome.
Ps - I'll have to locate the pattern online. I can't seem to find the link for it at the moment. Sorry! |
Archives
September 2018
Categories
All
|