I've seen a few crafters lately creating tutorials about how to photograph your crocheted items. I figured I might as well help you out with shooting tips, as well, since I am a professionally-trained photographer. We won't get into the knitty-gritties in this tutorial. If you are interested past the basics, research degrees, Kelvin, white balance, colour temperature, custom white balance, etc.
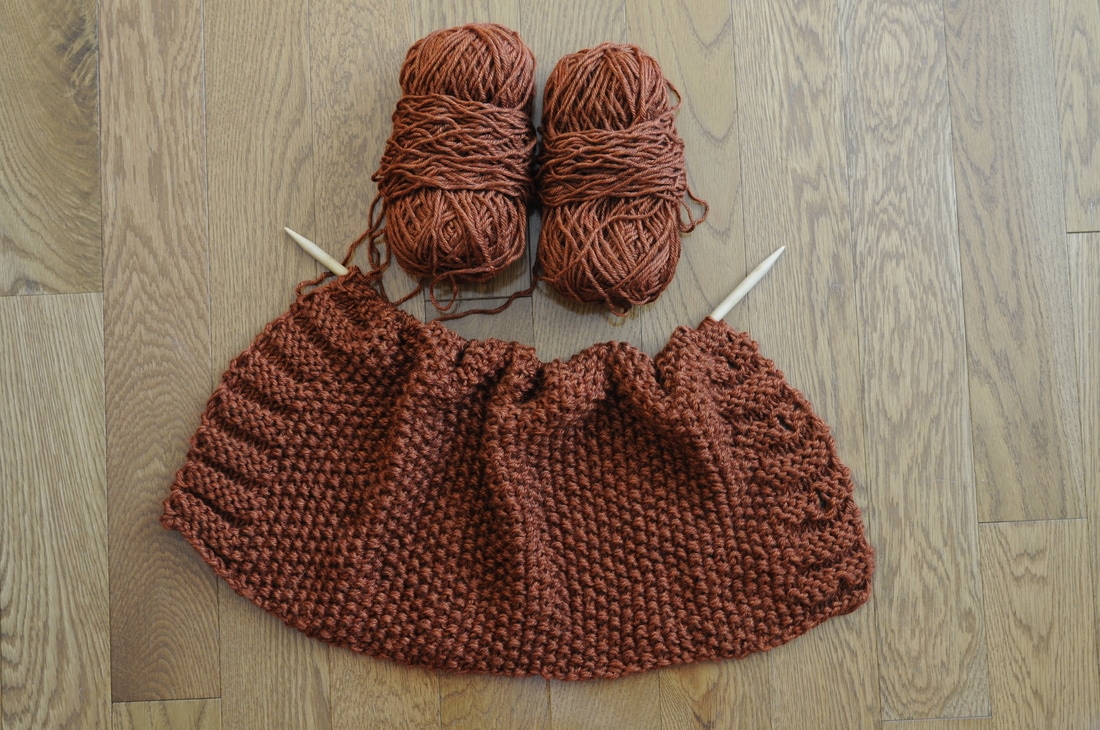
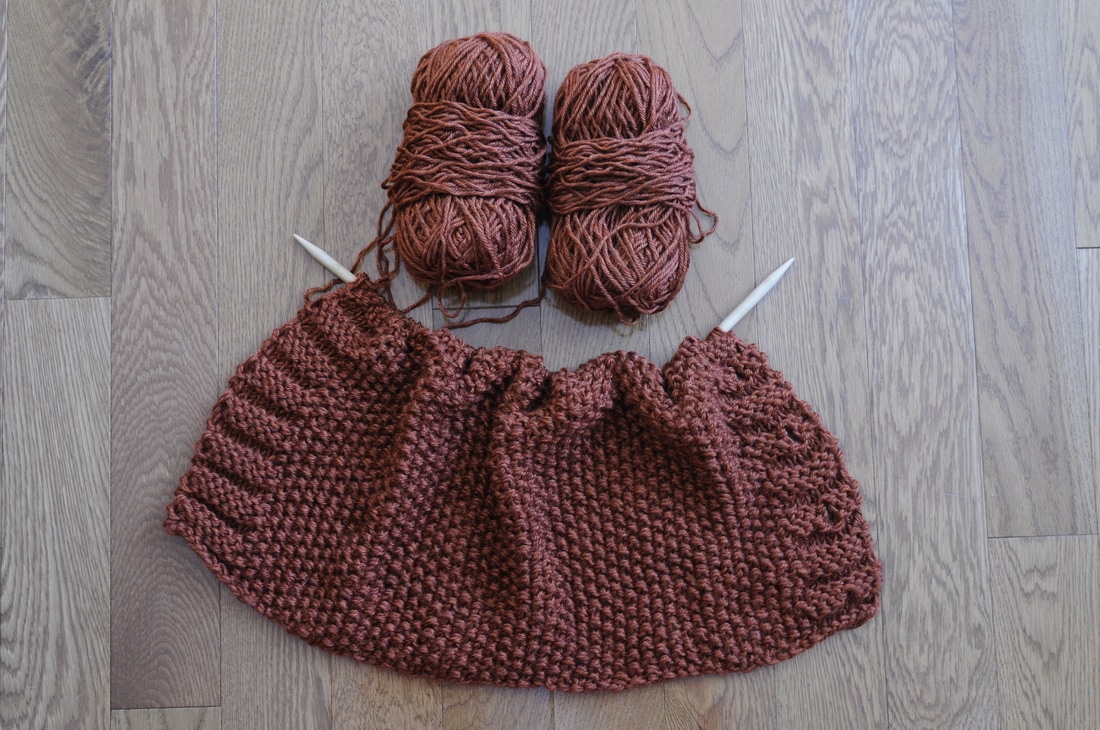
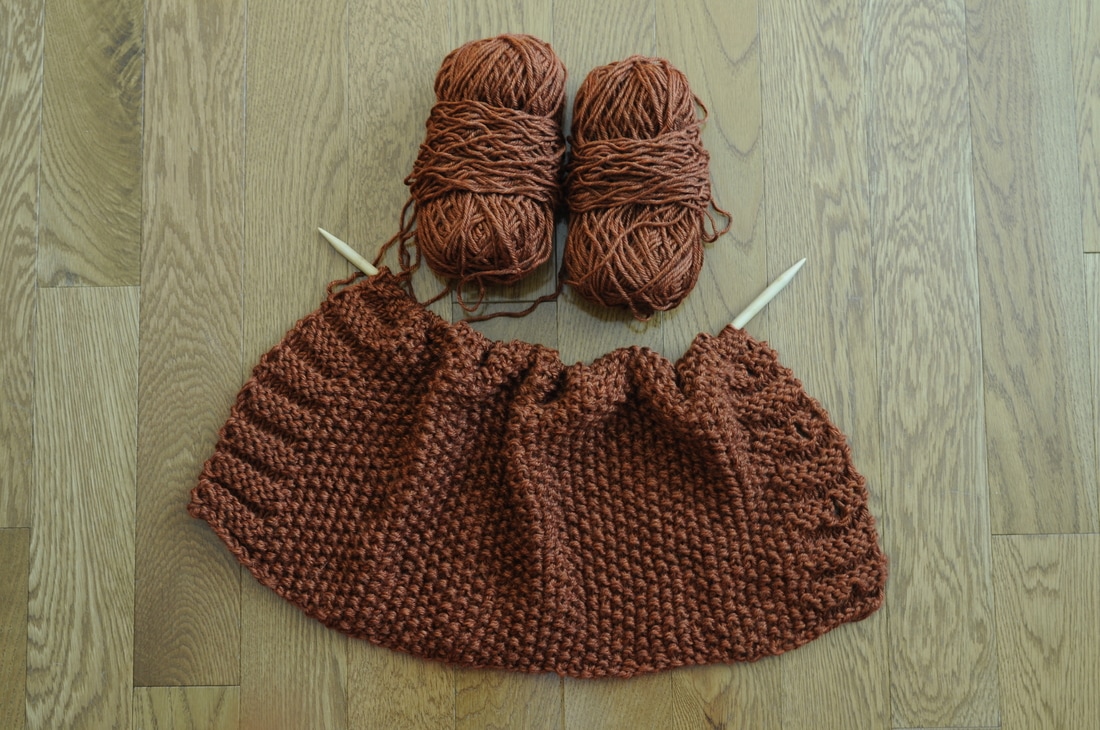
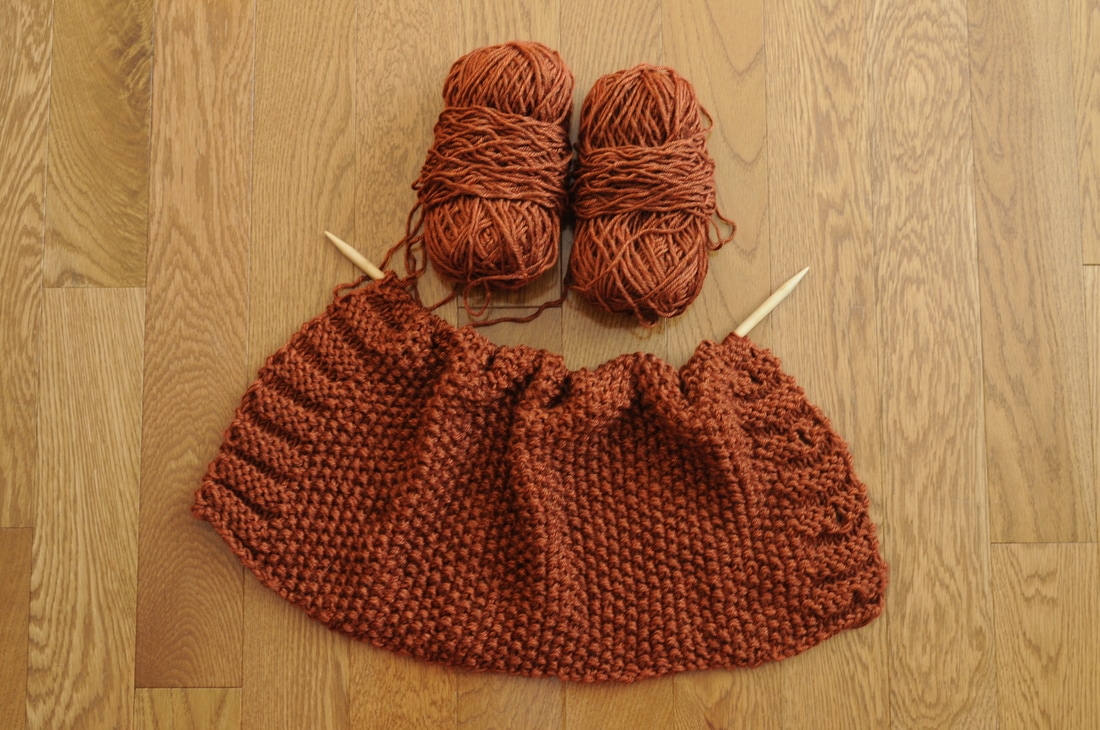
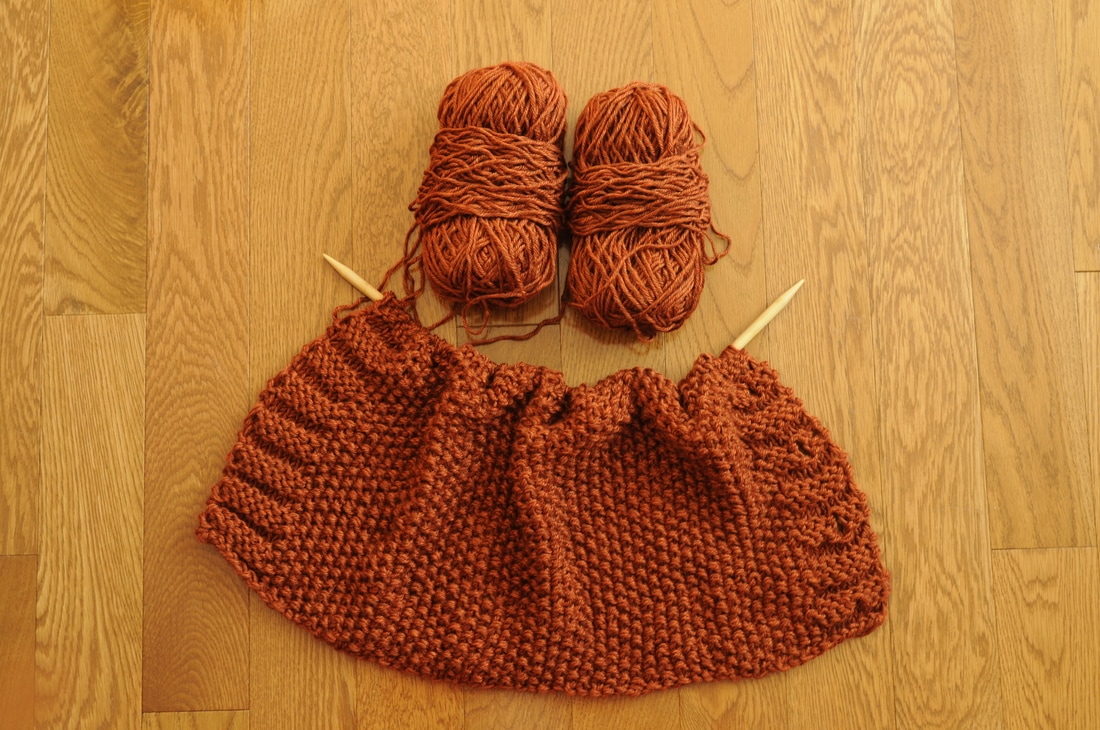
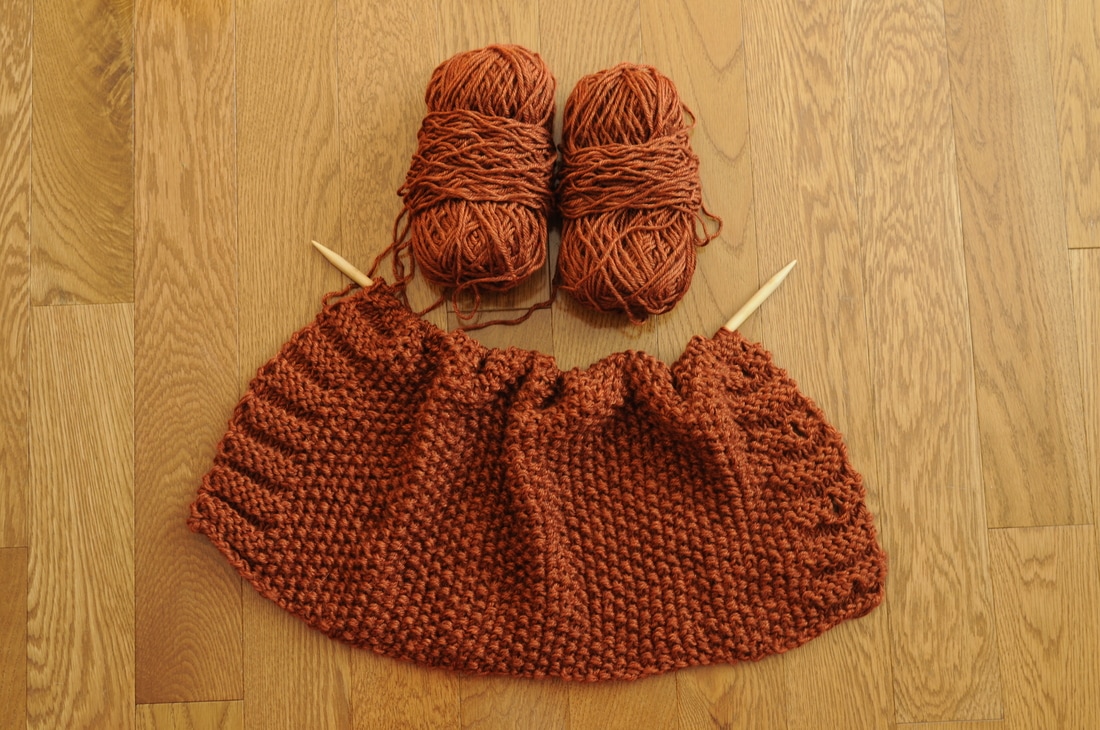
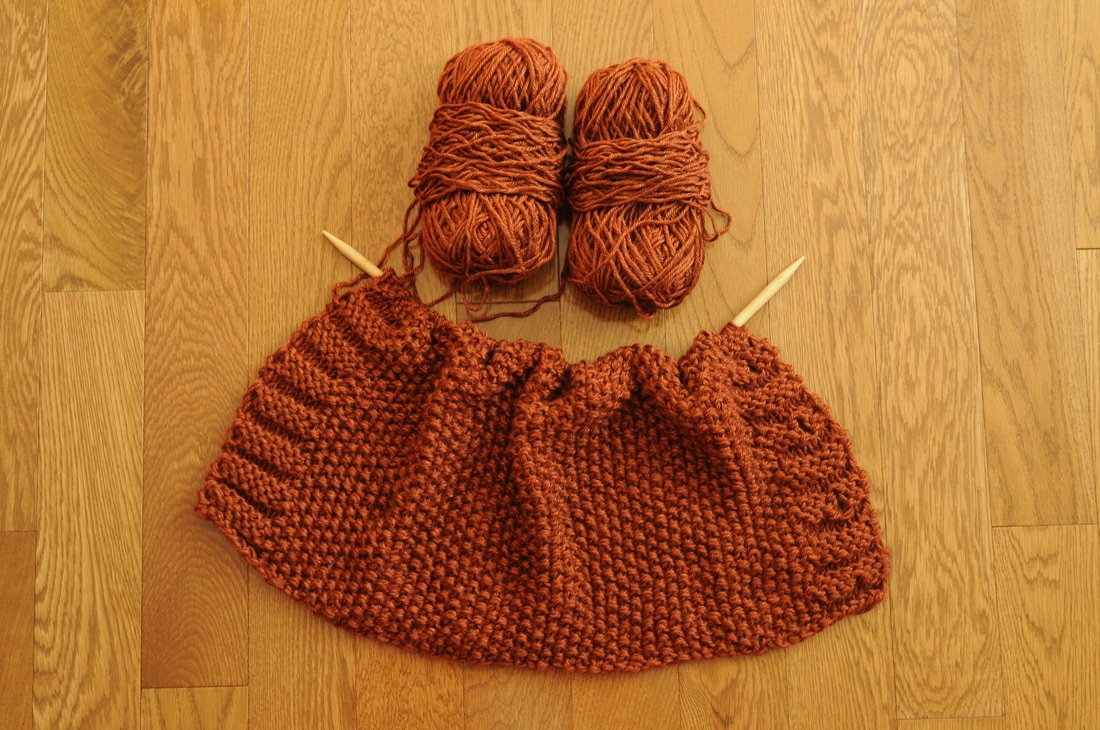
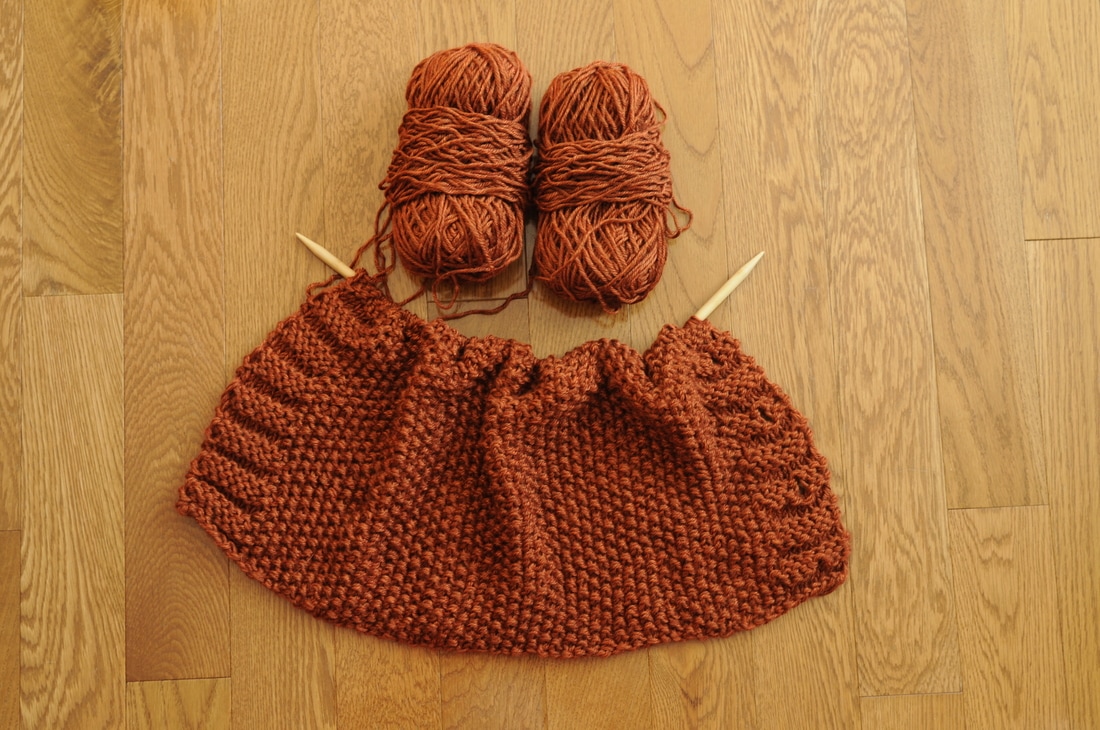
Take a moment to look at each of the photos above. They all have different white balances. If you hover over the photos, the names of the white balance settings will appear. We need to get you shooting your items with consistent colouring so that your photographs beautifully + properly display your creations. Read on to gain a basic understand of how to control white balances in your camera.
Take a moment to look at each of the photos above. They all have different white balances. If you hover over the photos, the names of the white balance settings will appear. We need to get you shooting your items with consistent colouring so that your photographs beautifully + properly display your creations. Read on to gain a basic understand of how to control white balances in your camera.
(Now, I shoot entirely in manual mode. This is because, as someone with training who is used to controlling every aspect of a photograph, I want to be able to tell my camera EXACTLY what I want it to do. And I want it to listen. The first time. Like you want your kids to listen. The first time. I know that it will listen to me, because it does not override my instructions while in manual mode. I recommend that, as you are comfortable, you move from completely automatic mode, then to scene modes, then to aperture priority + shutter priority, and finally manual. This is a sequence that will help you develop your camera skills gradually. Don't jump into manual until you understand the basics very well. You'll get frustrated if you skip the basics.)
So. Let's just cut to the chase for today's tutorial. We're going to deal with white balance. "White balance" is a term used to, basically, describe what your camera thinks should be white in your photo. You, the one holding the camera, tell your camera what white should look like in your photo, + your camera adjusts all the other colours to match, according to what that white is supposed to look like. You're balancing the colour levels for the white. Get it? White balance.
Here are the basic pre-set white balance options that are programmed into most modern cameras. Each option has a little icon/symbol to help you recognize it. These are the names of my white balance choices in my camera, along with what their corresponding symbols look like. Yours will be similar.
When you choose your white balance setting, you want to choose the setting that best represents the lighting conditions you are shooting in right then. Before you set up your photograph, though, there is an important lighting rule you should do your best to follow: use only ONE type of light source. If you are shooting outside, keep the sun as your only light source. If you are shooting inside, choose window light OR a lamp. Not both. If you are using a lamp, stick to one lamp to ensure your photos will turn out with proper colouring. If you are shooting indoors with a lamp and there is some window light coming in, too, close your blinds and/or shoot in a separate room.
Each light source has a different "colour temperature" and each colour temperature affects what white will look like to your camera. If you give your camera multiple light sources, each with its own light temperature, your photos will be wonky in colour, + you'll, consequently, lose some of your control over your photographs. Each time you add a new light source, you are confusing your camera.
The photos you see in this tutorial show what each white balance setting looks like to my camera when I used window light at noon from a bay window in my living room on a very sunny day. I moved my item into complete shade on my hardwood floor so that it was not in direct sunlight. Direct sunlight will make your shadows a very dark black and/or make your bright parts of your photos loose all their details. More on that in a tutorial at a later date about how to work with shadows.
The only setting I changed in my camera was the white balance setting. After shooting for each white balance option, I looked through the photos to see which setting gave the truest representation of the real, original colours of my item and its background. The cloudy setting was closest. It wasn't perfect, but it was pretty close, + was good enough for the purpose of this tutorial. After you figure out which setting is the best for that particular item in that lighting situation, go back to that setting and use it for the rest of your photos of the item. Remember to not move your item to a new lighting location...
If you change lighting (moving from shade to sunshine, moving to a different room, moving inside or outside, etc.), you need to re-evaluate which white balance setting is best (again). You want to keep your colour consistent from location to location, so once the first location is set up for your original colour(s), you'll need to go through each white balance option, + figure out which shows the original colours for that location, AND also shows the same colours, as much as possible, as your first location. You want your item to be the same colour no matter what lighting you use for your photographs. If your item changes from orange to blue-ish orange from photo to photo, clients + customers won't know what its actual colour is. You want your items to look consistent + true to their colours.
An important thing to note is that sunlight changes colour throughout the day, sometimes rapidly, + each day will be different. Go through the white balance process each time you shoot, even if it's only 1 hr later, or at the exact same time the next day. You'll be surprised by how much sunlight colour temperature can vary!
I hope that helps you understand the white balance basics of your camera. Here are today's takeaways:
Want more photography tutorials for shooting your crafty things? Check back periodically!
Want me to cover a specific tutorial topic? Write a comment below to let me know!
So. Let's just cut to the chase for today's tutorial. We're going to deal with white balance. "White balance" is a term used to, basically, describe what your camera thinks should be white in your photo. You, the one holding the camera, tell your camera what white should look like in your photo, + your camera adjusts all the other colours to match, according to what that white is supposed to look like. You're balancing the colour levels for the white. Get it? White balance.
Here are the basic pre-set white balance options that are programmed into most modern cameras. Each option has a little icon/symbol to help you recognize it. These are the names of my white balance choices in my camera, along with what their corresponding symbols look like. Yours will be similar.
- auto ( "A")
- tungsten (regular, old-school light bulb)
- white flouresent (long, tube light bulb)
- fine weather (sunshine)
- flash (lightning bolt with an arrow at the end)
- cloudy weather (cloud)
- shade (house with lines on the side)
When you choose your white balance setting, you want to choose the setting that best represents the lighting conditions you are shooting in right then. Before you set up your photograph, though, there is an important lighting rule you should do your best to follow: use only ONE type of light source. If you are shooting outside, keep the sun as your only light source. If you are shooting inside, choose window light OR a lamp. Not both. If you are using a lamp, stick to one lamp to ensure your photos will turn out with proper colouring. If you are shooting indoors with a lamp and there is some window light coming in, too, close your blinds and/or shoot in a separate room.
Each light source has a different "colour temperature" and each colour temperature affects what white will look like to your camera. If you give your camera multiple light sources, each with its own light temperature, your photos will be wonky in colour, + you'll, consequently, lose some of your control over your photographs. Each time you add a new light source, you are confusing your camera.
The photos you see in this tutorial show what each white balance setting looks like to my camera when I used window light at noon from a bay window in my living room on a very sunny day. I moved my item into complete shade on my hardwood floor so that it was not in direct sunlight. Direct sunlight will make your shadows a very dark black and/or make your bright parts of your photos loose all their details. More on that in a tutorial at a later date about how to work with shadows.
The only setting I changed in my camera was the white balance setting. After shooting for each white balance option, I looked through the photos to see which setting gave the truest representation of the real, original colours of my item and its background. The cloudy setting was closest. It wasn't perfect, but it was pretty close, + was good enough for the purpose of this tutorial. After you figure out which setting is the best for that particular item in that lighting situation, go back to that setting and use it for the rest of your photos of the item. Remember to not move your item to a new lighting location...
If you change lighting (moving from shade to sunshine, moving to a different room, moving inside or outside, etc.), you need to re-evaluate which white balance setting is best (again). You want to keep your colour consistent from location to location, so once the first location is set up for your original colour(s), you'll need to go through each white balance option, + figure out which shows the original colours for that location, AND also shows the same colours, as much as possible, as your first location. You want your item to be the same colour no matter what lighting you use for your photographs. If your item changes from orange to blue-ish orange from photo to photo, clients + customers won't know what its actual colour is. You want your items to look consistent + true to their colours.
An important thing to note is that sunlight changes colour throughout the day, sometimes rapidly, + each day will be different. Go through the white balance process each time you shoot, even if it's only 1 hr later, or at the exact same time the next day. You'll be surprised by how much sunlight colour temperature can vary!
I hope that helps you understand the white balance basics of your camera. Here are today's takeaways:
- keep your item + background colouring consistent throughout all of your photos
- use only 1 light source
- practice shooting the same item in the same lighting situation with each of the white balance options available in your camera
- choose the best white balance option
- shoot the rest of your photos using the same white balance choice
- re-evaluate your white balance setting for each new lighting environment
- there may not be a "perfect" pre-set white balance option for your item + lighting environment, so choose the option that is best for your particular situation
Want more photography tutorials for shooting your crafty things? Check back periodically!
Want me to cover a specific tutorial topic? Write a comment below to let me know!
 RSS Feed
